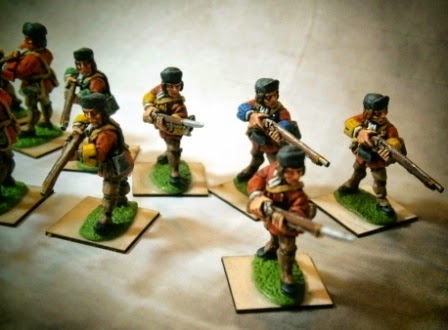
Today's post, some pictures of 28mm British Light Infantry for Muskets & Tomahawks. These are part of a commission I finished a while back. Figures are from AW Miniatures. The mix of facing colours is because the lights were drawn from a number of parent units to operate in a light infantry role.
Friday, 12 December 2014
Friday, 5 December 2014
Black Powder "Mascot"
G'day, today some pictures of "Big Wullie" a figure from Warlord Games, given away with copies of their "Black Powder" rules. I painted this fellow up for a customer of mine. The miniature is 28mm metal.
Wednesday, 3 December 2014
Something Different & Photographic Conundrums
In my last post I mentioned having trouble with getting decent pictures with my camera, lighting etc., & had to ditch a few photos I'd taken because they were so scungy. Well, I've had a second attempt at photographing the same miniatures but this time under my painting desk lamps on a neutral sort of background, I even messed about with some settings on the camera. Does anyone know what is the best ISO for miniatures photography? I'm pretty ignorant with camera speak, I may have to do some searching on the net to see what tips I can unearth. Anyway these photos are something of an improvement, still had to tweak stuff with software though. Let me know if you have any tips/advice.
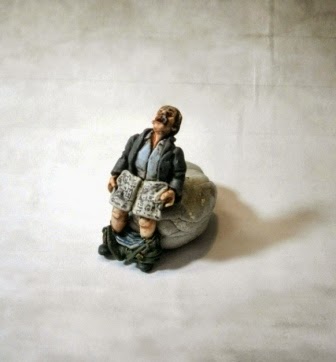
First up is a funny character in 28mm - a cockney bloke caught on the loo during a German Air Raid and giving them an earful - those Jerry Blighters! He was painted as part of commission work. He is sitting on a lump of blue tack to prop him up.
The first four pictures were salvaged, with much tweaking, from my original photo shoot. They were taken on the dining table, on a white sheet of paper with a photo print sky background.
The next photos of the same figure are from my second attempt some days later. I'm not sure that they are much better, just different. There were a number of photos I took of other miniatures which were better overall I think, I'll save them for another post.
Friday, 28 November 2014
Afrika Korps - Wartime Miniatures 20mm
G'day all. Today I'm sharing some pictures of a recently completed painting/basing commission of the new Wartime Miniatures 20mm Afrika Korps (DAK).
I did take a bunch of photos of other stuff but they were pretty woeful photos, all blue and poorly lit, I shall have to try again and see what I can adjust to improve them. Maybe I should try taking photos outdoors in natural light? I don't have a light box or anything fancy and usually have to tweak the photos using software to get the colours right.
I have sought to give the DAK a 1943 faded kind of look which my customer was keen on - rather than the more olive, darker colours of the newly issued German tropical uniforms. There are also some differences of colouring to reflect the DAK use of scrounged materials, (e.g. Italian and British uniform items), and the varied way that dyed fabrics can fade in the sun.
Please bear in mind that these are less than perfect photos, I think they look better "in the hand".
Saturday, 22 November 2014
Home Guard/Early War British/Dad's Army
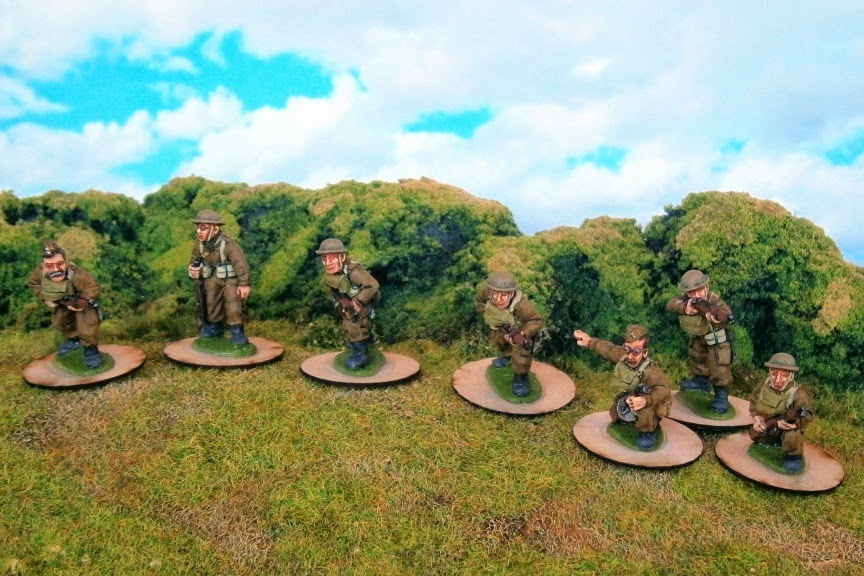
I have completed the Dad's Army/Home Guard/Early War British commission for a customer - he will be doing the basing.
I am quite pleased with how these turned out, and they were great fun to paint. All the figures are from the 28mm Wargames Foundry sets and very characterful they are too.
I have used some pictures of Tony Barton's wonderful 1/6th scale figures as reference for Home Guard uniform, in addition to looking at stills from "Dad's Army" for the character figures.
 |
| Heavy Weapons group |
 |
| L to R - Sgt Wilson, Cpt Mainwaring, Lance Corp Jones |
 |
| L to R - Godfrey, Wilson, Fraser, Mainwaring, Jones, Pike and Walker |
 |
| Dispatch Rider & Captain Square |
 |
| Mrs Fox, Home Guard on the phone, Old Codger (Mr Blewitt?) |
 |
| German disguised as a nun, Policeman, 5th Columnist (Luger hidden in basket) |
 |
| Reverend Timothy Farthing, Warden Hodges, the Verger |
Saturday, 15 November 2014
Clash at the Crossroads- A Battlegroup AAR
We had a great game of Battlegroup Overlord today, two players per side with me acting as partially impartial umpire- Can't help myself, I always barrack for the British ;-)
Denis & Daniel travelled over from Launceston and joined in with James & Ben. The British forces were jointly commanded by Denis & Ben using my figures etc., the Germans by James and Daniel using James' collection. The British used a 500 point list from the British Infantry Division list; the Germans a Panzer Division list - both taken from the Battlegroup Overlord book.
Denis & Daniel kindly brought over some extra terrain to help supplement my stuff - the extra roads were especially helpful.
I won't attempt to give a fully comprehensive report, but I did take quite a few pictures which should give you an idea along with their captions. In the end the British won, but it was a near run thing. We didn't get to play until the battle rating totals were reached due to time constraints. In the end I think the Germans lost 15 out of 27 BR and the British 10 out of 31. There was a desperate scramble for an all objectives held victory towards the end. It was unusual not to see more vehicles destroyed, in the end I think just one kubelwagen was written off or abandoned. A couple of infantry squads/sections were exterminated- the Germans lost two squads and a recon team, the British lost a section plus a casualty here and there.
First up some pictures of the terrain/battlefield setup:
And so it begins.....the Recce phase
Deployment of the main forces:
Thanks to everyone who took part, heaps of fun.
Denis & Daniel travelled over from Launceston and joined in with James & Ben. The British forces were jointly commanded by Denis & Ben using my figures etc., the Germans by James and Daniel using James' collection. The British used a 500 point list from the British Infantry Division list; the Germans a Panzer Division list - both taken from the Battlegroup Overlord book.
Denis & Daniel kindly brought over some extra terrain to help supplement my stuff - the extra roads were especially helpful.
I won't attempt to give a fully comprehensive report, but I did take quite a few pictures which should give you an idea along with their captions. In the end the British won, but it was a near run thing. We didn't get to play until the battle rating totals were reached due to time constraints. In the end I think the Germans lost 15 out of 27 BR and the British 10 out of 31. There was a desperate scramble for an all objectives held victory towards the end. It was unusual not to see more vehicles destroyed, in the end I think just one kubelwagen was written off or abandoned. A couple of infantry squads/sections were exterminated- the Germans lost two squads and a recon team, the British lost a section plus a casualty here and there.
First up some pictures of the terrain/battlefield setup:
 |
| The cow represents an objective marker, & the lone telegraph pole another. |
 |
| In the bottom left hand corner there is another cow objective marker outside the farmhouse. |
 |
| Another objective marker is a small cart (not quite visible) next to the smaller of the two outhouses at the back of the terraced cottages. |
And so it begins.....the Recce phase
 |
| Humber IV tentatively heads for an objective |
 |
| British sniper team in position. |
 |
| 2nd Sniper team in the shrubbery |
 |
| German Armoured car thinks about racing down the open road, but doesn't. |
Deployment of the main forces:
 |
| Germans concentrating for deployment |
 |
| German armoured car shelters behind bocage. |
 |
| The Humber IV by the farmhouse has just taken an objective. |
 |
| The café owner keeps some pigs out the back. |
 |
| Puma lurking |
 |
| Carrier team on recce |
 |
| Sniper and his spotter, hiding, but not well enough... |
 |
| There's that Humber again. |
 |
| German squads move out across the fields. |
 |
| The Puma sees the spotter from the sniper team and blasts him to oblivion. |
 |
| British on the move. |
 |
| British platoon command squad in immediate foreground. |
 |
| Humber goes on ambush fire, but in the end this achieved nothing. |
 |
| I think that section is all AB Miniatures |
 |
| The empty battlefield? Well, apart from the cow... |
 |
| German recce team deployed upstairs in one cottage having already taken a casualty in the far end house. A British sniper team sneakily deploys in the closest cottage. |
 |
| German comms halftrack |
 |
| An overview of things on the move. |
 |
| British sections spreading out. |
 |
| German squads sprint for the big bocage covered hill, get shot at by the Humber IV on the way, but it does no damage. |
 |
| The Germans deploy their Pak 40 with a nice view up the main road. |
 |
| This British section is steadily making their way to the area around the farmhouse. |
 |
| Churchills were pushed out two per flank. |
 |
| Successful German mortaring pinned a number of British units - the PIAT team... |
 |
| ...and platoon HQ |
 |
| Churchill, 2 inch mortar team and Forward HQ. |
 |
| Pak 40 on Ambush fire. |
 |
| The Tiger appears! |
 |
| Churchill loiters by the garage - perhaps the crew wants to pick up the latest Michelin Guide? |
 |
| A game of cat & mouse. The Puma ducks behind the barn away from the Churchill. |
 |
| German squads scramble through the dense bocage and down the embankment. |
 |
| A better view of the objective by the small outhouse. |
 |
| The Germans, just out of the bocage, get hit by a mortar stonk. |
 |
| The kubelwagen is written off in a mortar stonk. |
 |
| It took many attempts for the British to finally deal with the German recce team. Here you see the last man standing. |
 |
| British section pushes up to the hedges by the farmhouse, but they are doomed! |
 |
| German squads and HQ halftrack. |
 |
| British section thinks about getting into those houses, but in the end after taking some casualties, moves away to the crossroads. |
 |
| A German squad has occupied the end cottage- right of picture. |
 |
| The German squad in the end cottage is about to be blasted by the British. |
 |
| A German squad makes its way to the farmhouse. |
 |
| Oh dear here's the Tiger! The Tiger attempted to blow away the Humber IV but missed. |
 |
| German recce team is finally wiped out. |
 |
| German MG team gets behind the hedge. |
 |
| A German squad has moved up to occupy the backyard of the café - move over porkers. This squad blasted the British section down the lane by the farmhouse, causing casualties and a pin. |
 |
| Germans occupy the large farmhouse- who left the back door unlocked? The British section, in top left corner with pinned marker, gets wiped out. |
 |
| British section engage German squad, as does the Churchill. The German squad is eventually wiped out, but they hung on to the last man. |
 |
| A last ditch effort, a German command halftrack attempts to give the British a hail of lead- to no avail. |
Subscribe to:
Posts (Atom)
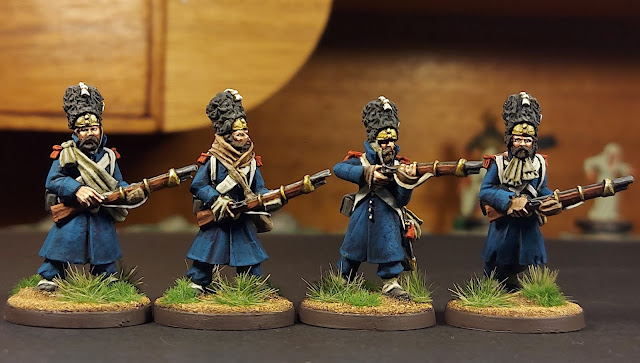
Old Guard & a Note of Caution
Hi Everyone! Here are some pictures of recently completed French Old Guard from North Star Military Figures Retreat From Moscow range. Plus...

-
Hi Everyone! Here are some pictures of recently completed French Old Guard from North Star Military Figures Retreat From Moscow range. Plus...
-
I have been a bit slow on the wargames/modelling production front of late- got a bit distracted by some PC games and life in general. Howeve...
-
Middle Earth Wargaming 28mm - Dwarves, Orcs & Hobbits First up a Dwarf with raven & gem topped staff - this is a metal miniatur...


