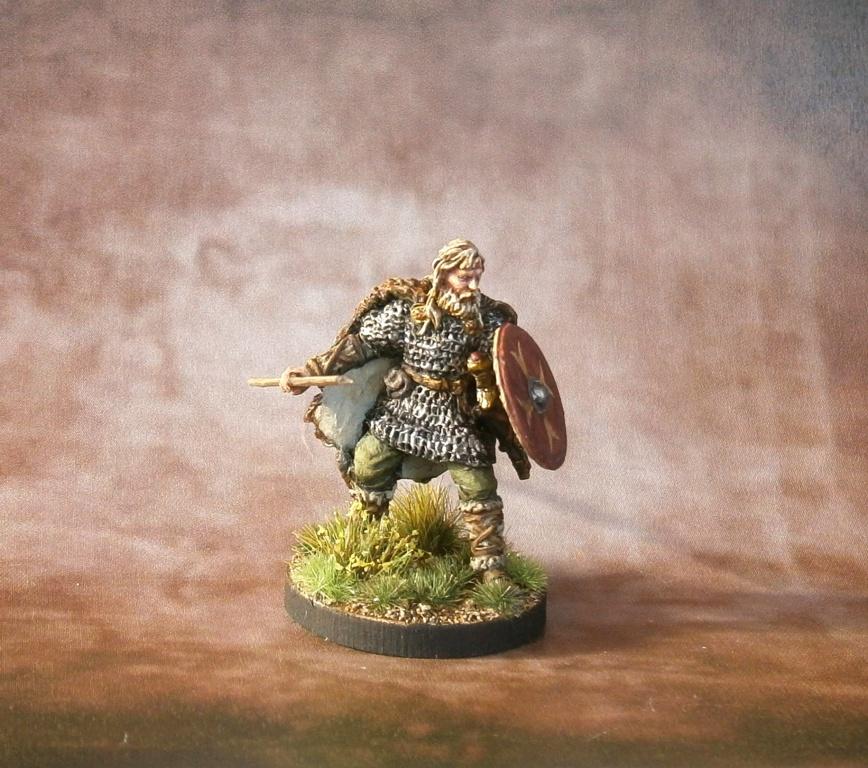
In the first picture (below), you can see another person's painted version of the original figure inset to the left. To the right is my completed conversion.
So, here's what did I to the original:
- As there is no integral base with this figure, I first drilled & pinned it to a mdf base.
- Removed metal plates from chest.
- Hand & Hammer were a separate piece, so I had to carefully cut away hammer from hand & drill hand out so as to fit spear.
- Left arm was bent around to take a shield.
- Thin layers of green-stuff were sculpted to create trousers and tunic to go under the mail shirt.
- Extra green-stuff was added to the beard to bulk it out a bit - hey if he's going for the "hairy barbarian" look, may as well give more facial hair :-)
- Mail shirt was sculpted on - my first go at sculpting a full mail shirt - being careful to leave the belt exposed.
- Added a green-stuff pouch to the belt.
- Did a press-mould of a very simple sword, to which I then added straps with thin pieces of masking tape, plus extra decoration with green-stuff to give the impression of knot-work.
- Stuck shield to left arm
- Painted the miniature & did the basing.
I hope you found the post interesting. I must say, I quite enjoyed this conversion lark, hopefully I will be doing a bit more and getting some sculpting practice.
All the best,
John.


Superb!! And so realistic, wonderful job!!
ReplyDeleteThanks Phil, glad you think so.
DeleteVery nice bit of conversion work John!
ReplyDeleteCheers Rodger, took me a while, but it was fun.
DeleteI was wondering what to do with that figure. Wasn't particularly impressed with the figure but I like what you have achieved.
ReplyDeleteStill think it is a little scrawny when put against my Foundry figures.
Thanks Stewart. Yes, it is stylistically quite different to the Foundry sculpts.
DeleteGreat work as always sir!
ReplyDeleteThank you sir :-)
DeleteGreat work! The inner side of the cape looks really realistic!!
ReplyDeleteGlad you like it :-)
DeleteBeautiful!
ReplyDelete